Search This Blog
Friday, October 1, 2010
MSD an High capicity map service than MXD
But there are few capabilities which ESRI provides to support display of large number of spatial data on any web mapping application. They have introduced MSD map document formart, which is lighter than the old and traditional MXD form
Map Service Publishing toolbar in ArcMap tune map documents for optimal performance. ESRI always recommends saving the map document (.mxd file) as an .msd file. A map service definition is a configuration file for an optimized map service, which yields significant performance gains over map services based on standard map documents. They are the
recommended format for the publication of dynamic maps in ArcGIS Server.
The comparison test results between the three map services show that overall, the
optimized map service (MSD_SDE) performed slightly better than the ArcIMS map
service (IMS_SDE) and significantly better than the standard map service (MXD_SDE).
Figure 4 shows the average response times18 for map requests at the point where the
server was working at its maximum throughput:
1 Optimized map service—56,520 maps/per hour; average response time: 0.69 seconds
2 ArcIMS map service—55,440 maps/per hour; average response time: 0.83 seconds
3 Standard map service—18,468 maps/per hour; average response time: 2.21 seconds
Clearly, the optimized map service outperformed the standard map service.
Note :- Source of this data from ESRI documents or ESRI White Paper.
Sunday, June 13, 2010
Back again with another ESRI software i.e. ArcSDE (Spatial Database Engine).It is Server based software by ESRI that spatially enables a Relational Database Management System to store spatial data and Attribute data in it. The spatial data may then be used as part of a geodatabase with any RDBMS.ArcSDE enables organisations to move from a traditional approach — managing a separate collection of geographic data files — to an integrated environment in which spatial data is managed as a continuous database that is accessible to the entire organisation and easily published on the Web.
The latest version, ArcSDE 9.3, is sold as a component of ArcGIS Server. It is part of the ArcGIS family of software products, that integrates geographic information query, mapping, spatial analysis, and editing within a multi-user enterprise DBMS environment.
ArcSDE is an application server that facilitates storing and managing spatial data (raster, vector, and survey) in a DBMS and makes the data available to many applications. ArcSDE allows you to manage spatial data in one of four commercial databases (IBM DB2, Informix, Microsoft SQL Server and Oracle).
ArcSDE grew to meet the need of users of geographic data for robust multi-user editing, storage and access of extremely large geospatial databases. ArcSDE supports the ESRI geodatabase implementation. ArcSDE pushes the relational model higher so that geographic data - which comprise several tables - can be managed by client software seamlessly. The user is not aware of, nor do they have to deal with, the particulars of the RDBMS. Connections to the database are all routed through the ArcSDE middleware, which performs the storing, and retrieval of data.
ArcSDE Installation Process
1) Click on the “ESRI.exe” file to run the ArcSDE Installation process.
2) Click “Run”> to proceed further.
 3) Click on “ArcSDE for Microsoft SQL Server”>
 4) Click “Next”>
 6) Click “Next” to begin the install of ArcSDE for Microsoft SQL Server
 7) Wait until process does not complete.
 8) Click “Finish” to exit the ArcSDE for Microsoft SQL Server setup.
 9) A user must install the ArcSDE for Microsoft SQL Server Post Installation setup before running ArcSDE for SQL Server. So Click “OK” to continue
 10) Select the Complete option and click “Next” to continue.
 12) The Post Installation wizard connects to Microsoft SQL Server with Windows Authentication or SQL Server Authentication to create the SDE user if the SDE user does not already exist.
It also creates the default spatial database, adds the SDE user to that spatial database, and grants the SDE user the required CREATE permissions in the database. At the User
• The name of the SQL Server instance to which the Post Installation wizard will be
• Whether you will connect to that instance with Windows Authentication or SQL Server
Click “Next” to continue.
 13) Once connected to Microsoft SQL Server with either Windows Authentication or SQL Server Authentication, you are required to provide information to create an ArcSDE spatial database. The following information is used to create the spatial database:
• SDE user password—This is required. You must provide a password for the SDE user
• Database name—Enter a name for the database. If you plan to use the multiple spatial database model for your geodatabase, your database must be named sde.If you plan to
• Data file size—You may accept the default data file size of 40 or you may enter a different
• Log file size—You may accept the default data file size of 30 or you may enter a different
• Storage locations for the data and log files—You can provide different locations To create
Click “Next” to continue
 14) Click ”OK”>
 15) Click ”OK”> to proceed further
 16) Select the “Use default options” in all three options and click “Next” to proceed further
Provide the following information for the Post Installation wizard to connect to SQL Server
• The SQL Server instance name—Your machine name is provided by default. Change this
• The database name for your ArcSDE spatial database—This is the database that was
• Specify whether you would like to connect using Windows Authentication or SQL Server Authentication. Windows Authentication uses your current Windows user name and
 18) Click “Yes”>
 19) This Summary detail will appear in Notepad.
1) Go to Start > All Programs > ArcGIS > ArcSDE > ArcSDE for SQL Server Post
Installation
2) Click “Next” to continue
 3) Select “I have received an authorization file from ESRI and am now ready to finish the registration process” option if you have already received your authorization file from ESRI Customer Service. If you select this option you can either browse to the location of the file
  4) Click “Browse” to select the file & Click “Next” to continue
 5) Click “Finish” to proced further
 6) Click “Next” to proceed ahead
• Service name—This is the name of your ArcSDE service. It must be a unique name. The default is esri_sde.
• Service port number—You must enter a unique TCP/IP port number. The default is
• ArcSDE database administrator (DBA) login—Your DBA user name, which has sysadmin privileges in the database; if you are using Windows authentication, you need to provide
• ArcSDE DBA password—Your DBA password
• Database name—The name of your ArcSDE spatial database. You created this in the first
• SQL Server instance name—Provide the name of your SQL Server instance. Your machine name is provided by default. If you are not using a local default instance of SQL Server,
• Server name—Provide the name of your server. Your machine name is provided by
Sunday, June 6, 2010
ArcGIS Server Post-Installation
A. Installation Process for Microsoft .NET Framework 3.5
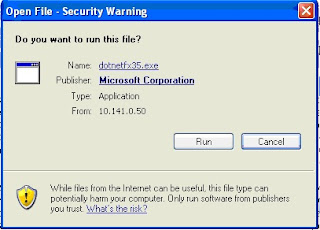
1) Run the dotnetfx35.exe file.
3) Read the Microsoft .NET Framework 3.5 SP1 Agreement and then, if you accept the
conditions of the software license, click “I accept the license agreement,” then click the Next
button.
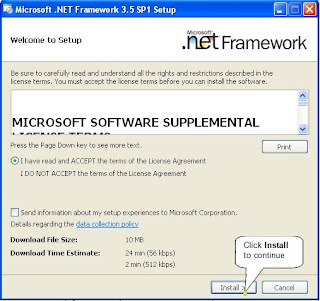
4) Click Install> to process further.
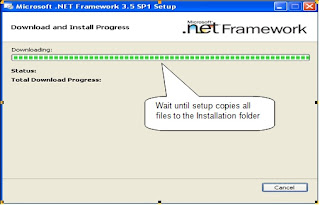 5) After accomplishment of the download process you will be presented with the “Download
Complete” window.
B. Installation process for ArcGIS Server for the Microsoft .Net Framework.
ArcGIS Server is designed to deploy sophisticated GIS functionality from centralized servers
to support enterprise GIS implementations and applications. ArcGIS Server provides the
framework for developers to create focused GIS Web applications and services that can be
utilized by clients including browser-based applications, ArcGIS Desktop, and ArcGIS Engine
applications. The entire ArcGIS System is built and extended using software components
called ArcObjects. ArcGIS Server is an object server for ArcObjects.Installation steps for
ArcGIS Server for the Microsoft .NET Framework are
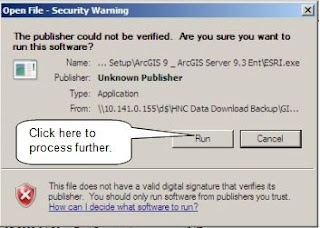
1) Run the setup by click on the ESRI.exe file. You will be presented with the below “Open
file” pop-up and Press “Run” button to process further and “Cancel” for decline the same.
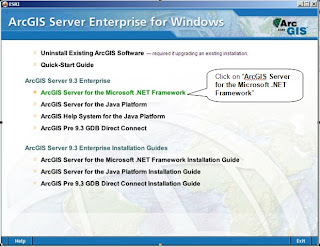
 2) Choose “ArcGIS Server for the Microsoft .NET Framework”. After a few seconds
you will be presented with the following ArcEditor Setup welcome page.
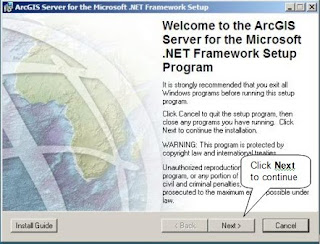
3) Click Next>. The ArcGIS Server for the Microsoft .NET Framwork Setup window appear.
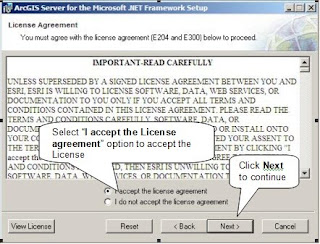
license, click "I accept the license agreement, then click the Next button".
5) Here refer the unavialble features & Clieck Next.
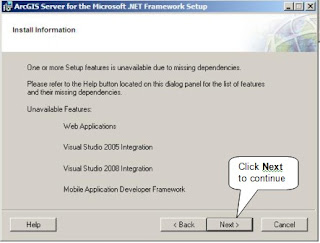
6) The ArcGIS Server for the Microsoft .NET Framework setup program allows you to select
the features you would like to install. By default the features of a typical ArcGIS Server
installation are selected to be installed. A typical installation includes the features most
commonly installed on one machine.
heading and click Entire feature will be unavailable.
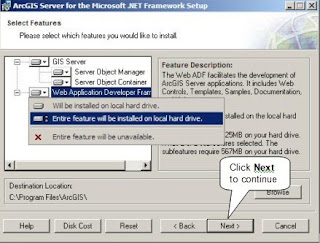 Here click on button of “Web Application Developer Framework option” and select the
“Enter feature will be inserted in the local hard drive” & Click Next> to proceed
further.
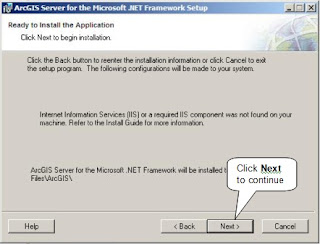
7) Click Next> on "Ready to install the application" popup-up to proceed further.
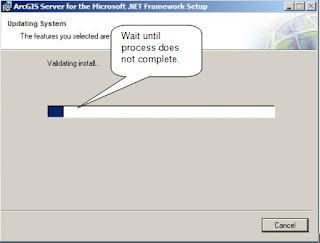
8) Here on "Updating System" pop-up few seconds of processing will be takings place
depending on the system hardware configuration.
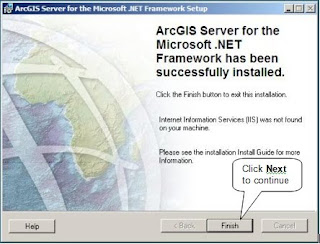
9) Click Finish > for the successfully installation of ArcGIS Server for the Microsoft .Net
Framework.
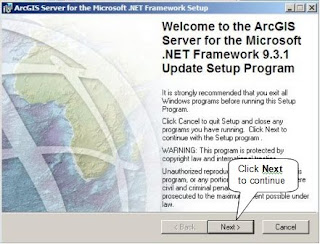
 10) Installation of ArcGIS Server for Microsoft .Net Framework Service Pack 1.
Run the "ArcGIS Server for Microsoft .Net Framework 9.3.1 service pack" file & click
"Next" to continue.
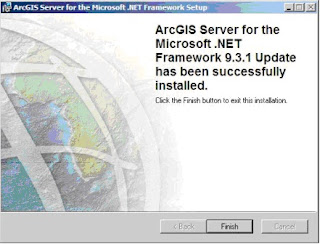
11) Wait untill process does not complete.
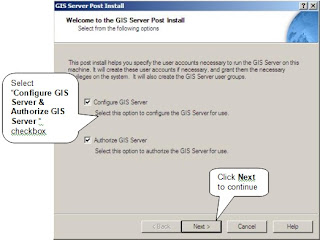
 12) Installation of ArcGIS Server Post Installation
Click on the “OK” button to start the GIS Server Post Installation. We must complete the
GIS Server post installation to successfully configure ArcGIS Server for use.
There are two GIS Server post installation setup options: Configure GIS Server and
Authorize GIS Server. The features that you choose to install will determine what post
installation options are available. If you installed the Server Object Container, both post
installation options must be successfully completed.
Here select the “Configure GIS Server” & “Authorize GIS Server” checkbox & Click
Next> to proceed further.
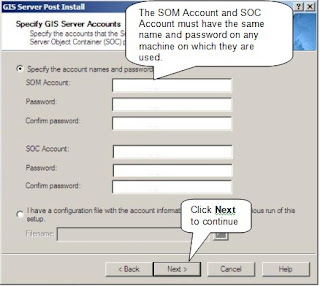
13) The SOM Account and SOC Account must have the same name and password on any
machine on which they are used. Additionally, any user in the agsusers or agsadmin group
must also have the same name and password on any machine on which they are used.
If you have already run this Post Installation on another machine and saved the account
and proxy server information to a configuration file, Click the "I have a configuration file..."
option and either type the path and name, or click the browse button and browser to the
configuration file containing the account and proxy server information.
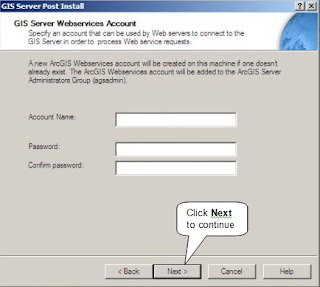
14) User must provide an account to be used by Web servers to connect to the GIS Server in
order to process Web service requests. You can either select to create a new local account,
or use an existing account. A new domain account can not be created by the post
installation.
Applications post installation (launched on the machine where the Web Applications
feature is installed),
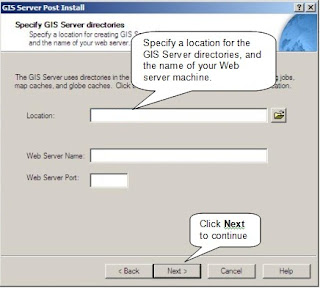
15) Specify a location for the GIS Server directories, and the name of your Web server
machine.
By default c:\arcgiserver is provided for the location of the GIS directories. However, use
the Browse button to change this default location. Output, cache and jobs directories will be
created in this location.
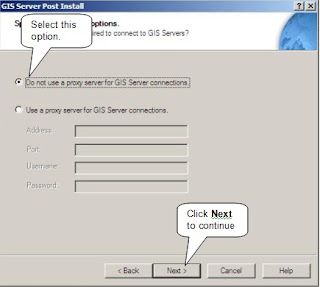
16) If you require a proxy server to connect to the Internet and you want to create
MapServers that contain layers that require an Internet connection (such as ArcIMS
image layers or ArcGIS Server MapServer layers based on a MapServer Web service),
then the post installation setup will allow you to specify your proxy server information.
At the Specify proxy server options dialog box, specify the proxy server Address, Port,
Username and Password, or accept the default Do not use a proxy server for ArcGIS
Server connections option.
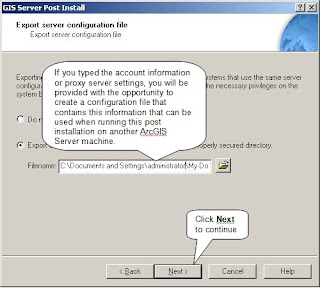
17) If you typed the account information or proxy server settings, you will be provided with
the opportunity to create a configuration file that contains this information that can be used
when running this post installation on another ArcGIS Server machine. If you select this
option you will be required to provide a location and name for this file.
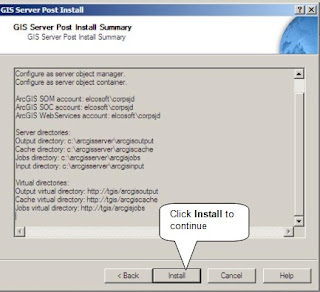
After clicking Next, a summary information dialog is displayed, click Install to begin
configuration.
18) During configuration, a status report is displayed detailing what the post installation setup
is configuring on your system.
 19) To successfully configure your machine using your authorization file Choose your
Registration option. You can configure your machine using three methods:
1. I have installed my software and need to register it.
Select this option if you do not have an authorization file already. There are several methods to provide your registration information.
2. I have already registered the software and need to register additional options or extensions.
Select this option if you have already registered the GIS Server for use, but you would like to register additional options or extensions (if available). There are several methods to provide your registration information.
3. I have received an authorization file from ESRI and am now ready to finish the registration process
Select this option if you have already received your authorization file from ESRI Customer Service. If you select this option you can either browse to the location of the file (if you received the file by email), or you can manually enter the authorization information.
If you chose the option to browse to an authorization file on disk, you are required to Choose or enter the location of your authorization file that you received from Customer Service.
If you chose the option to manually enter the authorization information, you are required to provide the following information: (This information can be obtained from the authorization file you received by mail, email, telephone or fax).
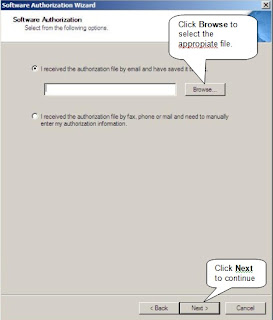 Here select the 3rd option “I have received an authorization file from ESRI and am now ready to
finish the registration process” and click “Next” to proceed further.
20) Here click on the "Browser" button and select license share file from local
machine.
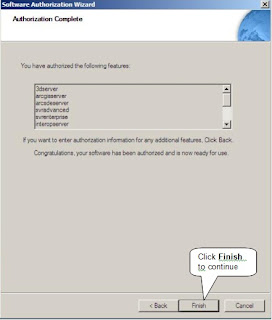
21) Click Finish> to complete the GIS Server post installation.
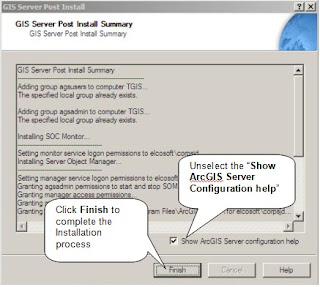 22) After Post installation restart your system with the same user Name & Password.
Start/Programs/ArcGIS/ArcGIS Server for Microsoft .NET Framework/ArcGIS Server
Help file as shown below.
Will be back soon with ArcGIS Server Services Configurations.


